Item System
UE5 Inventory and Item System Version: 3.0The item system is what manages the data associated with each item in our game. This data includes the name, description, flavor text, what happens if it is used, stack size, the icon, static mesh (to spawn in the world), amongst other things. Anything the user needs to know about related specifically to a specific item is what the Item System handles.
All this information is saved to a DataTable found in the Blueprints/Variables/DataTables/ DT_Items, which is built off the structure found at Blueprints/Variables/Structures/ F_Item.
To retrieve the information about an item from this data table we use the helper function called getItem located in the BP_Shared_Functions blueprint function library (found at the top of the Blueprints/Variables folder). You can call this function from anywhere without using a reference since it is part of our function library.
To lookup an item with this helper function you need to provide just the row name, and it will return the item’s structure and a boolean to indicate if the item was actually found.
You will see the Name variable type as an input on a lot of the functions and events in the other parts of this system when referencing the Items system, this value is the row name for the item in the data table.
The item system uses the interact system when an item is dropped, spawned, or picked up from the world.
Create New Items
To create new items for your game all you need to do is add a new row to the DT_Items data table located in the Blueprints/Variables/DataTables folder.
The RowName for each item is what we use when we want to identify the item in the system, I recommend keeping them simple, and setting them to something easy to type.
Here is a break down of each of the fields:
Spawning Items in the World
To spawn an item from your DT_Items data table in the world drop a copy of BP_Interactable_Item from the Blueprints/Interactables/Items folder into the world. Then from the details panel enter the ItemRowName of your item. After entering your ItemRowName you should see your item appear in the editor. You can also make child classes of this blueprint if you have items you plan on putting in the world a lot, this will save you some time typing as well as give you a common point to work with in case you need to make changes to all instances of it.
To spawn an item in the world through blueprint right click and search for “Spawn Actor From Class”, select it, then select BP_Interactable_Item from the Class list. The spawn node will update and reveal all the exposed variables. Spawn Transform, ItemRowName and ItemQuantity are the main things you will need for spawning an item in the world.

 Dyno! I see it but when I press play it is gone ...
This is most likely an issue with the collision. To test, try raising the item up in the air a little bit to give you enough time to see if it is actually just falling through the ground when you press play. If it is falling through the ground then it is a collision issue with the Static Mesh you are using for this item. It is an easy fix, just open up the static mesh and click view > Simple Collisions. If you don’t see a green wireframe then you are missing a simple collision. Use the collision menu to add one that best fits your item. If you do see the green wireframe or if it still doesn’t work after adding it then check the Collision Complexity setting in the details panel and make sure it is not set to Use Complex as Simple, set it to one of the other options instead, you want to use Simple collision.
Decaying Items in the World
The BP_Interactable_Item has a float variable called DespawnIn, this is the number of seconds you want this item to exist in the world before it is destroyed. This timer starts as soon as the item is spawned.
By default it is set to 0 which is until the map restarts. Keep in mind there is no world persistence system which will persist items between map loads and restarts. That is something you will have to handle.
Working within Blueprint
Before I show you how to add items, you need to know that the Player Inventory, Hotbar, Bank, and Equipment systems all use an instance of the AC_Inventory component. While these systems have different purposes on the surface, at the core of them they are all just working with an instance of the same component class. This component is simply our storage mechanism.
Adding and removing items with these player systems works the same exact way, the only thing that changes is the reference that you use. These references are all made easily available to you through the AC_InventoryItemSystem component you attached to your Player Controller.
The AC_InventoryItemSystem is the main hub that sets up and connects everything between the various systems and the player’s UI. The actual functionality for anything related to the storage, use and removal of items is handled inside the AC_Inventory component. The AC_InventoryItemSystem creates the AC_Inventory components needed for the Inventory, Hotbar, Bank, and Equipment on begin play. You want to make it a habit to work through the AC_InventoryItemSystem instead of around it.
So the first thing you will most likely want to do is get a reference to your AC_InventoryItemSystem on your Player Controller. I like to do this on begin play and then cache it for use through the blueprint:

I do not recommend skipping the caching and just calling the GetComponentByClass every time you need it. It is much more efficient to save the reference and reuse it. This reference is not going to change unless the player controller changes.
Now that we have our AC_InventoryItemSystem variable we can use it to get a reference to each of the the AC_Inventory components for the player’s various systems.

There are all kinds of helper events and functions inside the AC_Inventory and AC_InventoryItemSystem, make sure you open them up and take a look at the list. Each one should have a description that tells you what it does. You can call any of these functions from the references we created above.
Let's say the player just completed a quest in your game and you wanted to add 3 loot boxes to the player’s inventory, this is what you would call:

ItemRowName is the row name for the item in DT_Items data table. Quantity is the number of the items the player will receive. You can leave ToSlotID as -1, this tells the system to automatically find the best place to store it, filling stacks before new slots. OverrideData can also be left blank, this is used if you want to override the default Item Data you have stored in the data table.
The Hotbar, Bank, and Equipment all work the same way. You also do not need to tell the equipment system what slot it needs to go in or to do anything extra, just adding it to the inventory component is all you need to do, the system will automatically detect the change and put it in a valid slot, if one is empty. If there is not an available slot the item will be moved back to the player’s inventory.
Starter Items
Dynoooo? I want to give the player some gear when the game starts, how do I do this?
It is all about the timing Timmy, chances are you are trying to add inventory before the system is finished loading.
To help you with this goal give the included Starter Items system a try. With it you can add items to any of the player’s storage systems (including hotbar and equipment) at the very start of your game. These are also awarded only once per player.
Add Starter Items
Select the AC_InventoryItemSystem you added to your player controller and expand the PlayerSettings section on the details panel to reveal the StarterItems map.
The key for this map is the player system you wish to add items to, the value for each is an array where each item has the fields of ItemRowName a reference to the row name for the item in the DT_Items, Quantity the amount of this item the player should get, and OverrideData if you need to override or add any ItemData that is set in the DT_Items datable for that item.
Starter items are only awarded when the save game for the player’s component is generated for the very first time. Which means to award starter items again you must reset the player inventory. Take a look at the BP_Button_ResetPlayer blueprint in the Demo/MapHelpers/WorldButtons/ folder to see how to reset everything for a player using blueprint.
Usable Items
We use usable items when we want to perform some kind of functionality when the user double clicks on the item. This is how you would handle consumables like foods and potions. It is also how you handle things like loot boxes.
What you don’t want to try and do is use the usable system as a way to manage equipment. The reason for this is the blueprint for the usable item only exists for the moment, and then is destroyed after it performs its function. It does not persist. You don’t want bits of code sticking around every time someone uses a health potion, this is how memory leaks happen.
Create Usable Item
The first thing you need to do is create the logic you want to happen when the item is used. We do this in a child blueprint of AC_ItemOnUse found in the Blueprints/Components/UsableItems folder. Go ahead and make a child of this blueprint then open it up. Hover over the functions list panel and the Override drop down will appear, click it and select UseItem.
The UseItem event that appeared is where you want to add your functionality for this usable item. As inputs the node will provide you with the player controller the item was used on, the ItemData for the item and the ItemRowName for the item that was used.
The UseItem event will be called automatically when the item is used from the player inventory or hotbar.
Remember, after it is called this child component will be destroyed.
To help you get started I’ve included a handful of usable item examples, they include:
- 2 different loot box handlers, a simple one (AC_ItemOnUse_LootBox_Simple) where you supply the items you want to use, and one that uses the loot tables system (AC_ItemOnUse_LootBox_LootTable). The loot_box item uses the loot tables version, and the loot_box_extreme and red_meat_box use the simple method.
- An example of adding a slot to the player’s inventory until the end of the current session (AC_ItemOnUse_AddInventorySlot). The golden goose egg uses this one if you use it before it spoils and turns into a gold coin.
- The meat eating example, which just shows a different message on the screen. (AC_ItemOnUse_EatMeat).
Reusable Items
When you use a usable item it is also removed from the player’s inventory by default. To make an item reusable you need to set the IsReusableItem? to true in the AC_ItemOnUse child blueprint you created. If this is true the item will not be removed from the player’s inventory when it is used.
Reusable Items but with Charges
You can take the reusable items a step further and give them charges. To accomplish this you need to add the charges ItemData key to your item, the value is the number of charges you want to use. An example of this in the demo world is the loot_box.
Avoid putting charges on stackable items! Here is why …
Under normal use charges on a stackable item will cause all other items in the same stack to lose their stacks at the same time without the benefit. The end result is when you use all the charges, all the others in the stack will have 0 and while they can be used they won’t do anything but instead just destroy themself on use.
It also opens up an exploit where the player can abuse the charges remaining by merging an item with only 1 charge left into another with a full stack, and as a result it will reset the charge counter of it to match the stack it is being merged into. Then they can remove one from the stack, store the others, and use the item again until the stack is down to 1 and repeat the process.
The reason for this is because “charges” is a [dynamic item data] key, meaning the data of it can change or differ from others of the same item. A limitation to the current Item Data system is managing dynamic item data like this for different items but in the same stack, this is why we must use non-stackable items, it is a requirement for dynamic item data.
Item Data
Item data is our collection of key value data for our items. It is how we can store data and information about the item “inside of it” for use by other parts of our game while at the same time other copies of the same item can have equal or different values of the same or different stats.
Each key represents the name of your variable, and each value is the value of it. Both keys and values are strings as strings are the most versatile format to work with. You can call the keys anything you want, just remember if you change them you will have to update all other items using them. It is good to try and think ahead when you are coming up with your names for your keys, while at the same time trying to keep them very simple.
Example uses of Item Data
Here is a simple example of item data in action… Let's say you have a helmet you want to add 25 armor to. You would put armor in the key and 25 in the value. That’s it! Now 25 armor will be attached to that item regardless of who owns it.
You can also change these values and remove them at a later time if you need. I am calling this type dynamic item data and later in this chapter we will go over that.
Another more advanced example is our loot_box item in the demo world which uses a loot table with the rewards being pretty common items. Now let’s say Timmy has gotten a few of them so far, and obviously has not gotten anything that great. He just killed his first boss in our game, and we want to make him feel extra special.
Now you could create another loot box item with a different loot table to give to him instead, or we can use the same one he is already familiar with getting and just change the loot table to make it more rewarding.
This way it appears as if the one Timmy has received a few times just gave him some really special loot. Timmy will feel lucky and at the same time will still value that normal loot box that is just eating away space in his inventory.
We know it is a waste of space but Timmy doesn’t because Timmy got a really cool sword out of one that one time. Changing the item he is given will make him value the ones he always gets less and he may just sell them or even drop them if he doesn’t have the space to carry it back to town.
A lot about game development is mastering the art of illusion. This is an example of that and “luck”.
An even more advanced implementation of the Item Data system is the included Spoil System. The spoil system uses a collection of integrated tap in points to show the remaining spoil time in the ui, it also starts the spoiling and handles the speed of the spoiling process. We will go over more of what is involved with that later in this chapter.
A note about changing the default item data in the data table …
Since the data is saved inside the instance of the item, it is now a living breathing thing in your world and you can’t just change the defaults in the data table to update all copies of it currently in the player’s world.
Changing the default item data will only update ones that are newly created. You will need to come up with a way to purge the old and re add the new ones if this is an issue for you.
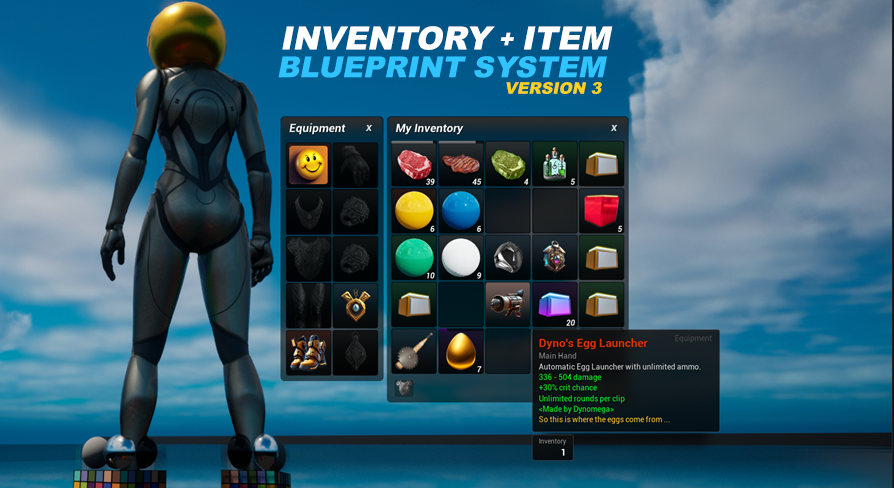
Showing Data on Tooltips
By default all data is hidden from the tooltips, this gives you the opportunity to include things you don’t want the player to know about but could still affect the gameplay.
To show your data key on the tooltips we use the DT_ItemTooltipPublicData data table. Simply add your key as a row name and provide the format string using {value} as the point in the string you want the value to appear.
There is also the string variable {s} which can be used to add the letter s to the end of a word if the value is not equal to 1. For example you wouldn’t want it to say “1 charges” when really it should say “1 charge”, but at the same time you want 4 charges to show as “4 charges” and not “4 charge”, the {s} variable handles this for us. Here are a few example of the use of these variables in the Format string:
+{value} defense
{value} rounds per clip
{value} charge{s}
<Made by {value}>
The ValueType is another level of format which can be used to further format the {value} before it is inserted into your formatted string. There are 4 ValueType formatters, they include:
I could also see the need for something like Range but instead using a fixed point for min and max. If this sounds like something you would need, or if there is another format you would like to see let me know.
Next we have the ValueReplacers this is how you can dynamic adjust the output, for example with our clip_size, if we set the value to 0 we know this is unlimited in our code but it would look really strange to the player to see “0 rounds per clip”, this is where value replacers come in, with it we can change 0 to show as “Unlimited” for this particular variable so it reads as “Unlimited rounders per clip” to the player, which although is not perfect makes a lot more sense then seeing “0 rounds per clip”.
The last field is ValueVariable and this is currently only used when using the Range ValueType. This value is the deviation amount of the range.
Remove Data Override
There is also an item data key called “remove” which will remove another key from the data when the data is merged (which happens when it is created / transferred). You really shouldn’t use this unless you know exactly what you are doing and have a really good understanding of how this system works. An example of the usage of this can be found in the demo world for the loot box that has unlimited charges. The reason it has unlimited charges is because the item is a reusable item by default, and on the Override Data in the BP_Interactable_item for the loot box I placed in the world I set the item data Key “remove” with the value of “charges”. This causes it to remove the “charges” key, which is what controls destroying the loot box after it is opened a few times. The “remove” item data key can be used multiple times on the same item if you need to remove multiple points of data.
Dynamic Item Data
Dynamic Item Data is data with values that can change, or other copies of the same item can have different values of the same or different keys. An example of the dynamic item data is the “charges” system found on the loot_boxes in the demo world.
With each use, the value of the charges remaining is reduced. Once it hits 0 the item is destroyed. This “charges remaining” persists through the life of the item whether it is in one of our bags, dropped in the world, or in another player's storage container.
You can get real wild with item data, but it is a double edge sword, you have to be careful with how you use it, and how your players can abuse it, because they will if they find out how. Remember, with great power comes great responsibility.
Take a look at the Data section of the functions in the AC_Inventory component, these are all related to item data. Each function will provide you with a description of what it does.
You can change data using the changeDataInSlot function, or use changeDataInSlotDecrement which can be used for simple decrementation of an integer value.
There is findReplaceData which will try to find the key, and replace it, while also giving you the option to add it if it wasn’t found.
Whenever a change occurs to item data it will trigger a save event, so this is not the kind of thing you want to be hammering with calls every tick.
Logic Tap in Points
If you didn’t think item data was crazy enough let me introduce you to the tap in points. These precisely placed points of entry give you a simple and easy way to create advanced experiences using your item data.
The spoil system was actually created to demonstrate the various tap in points and how you can use item data to create new experiences. The spoil system uses these tap-in points to show the decaying progress bar on an item, and also how the tooltip for a spoiling item will count down while we are looking at it. It also does a few other things which I will explain below.
The following tap in point functions can be found inside of the AC_Inventory component:
Those are the tap in points! Since our ItemData in our data table is not actually a map we can have multiple occurrences of each of these keys to load multiple systems for the same item.
As for the spoil system there is a little bit more going on to make it work but everything related to the instance of the item being spoiled is handled through these tap in points. From activation to presentation of the data and altering of it when we need to adjust the spoil speed.
I am kind of excited to see what you end up creating with this part of the system. If you make something really cool please show it off to me!
Spoilable Items
The included spoilable items system is an advanced usage of the item data system with it you can make items decay and self destroy over time.
There are a few things you should know before you use it. It is a non-counter based spoil system, instead I am using a timestamp to track when the item should spoil. This timestamp is based on GMT.
This was the best approach for multiplayer as it is not only more efficient then something that requires constantly updating the item data to track a decrementing counter, but it also works while the player is offline (even in single player), and is not affected by the client’s local time.
To change how it works with time you are going to want to check out the functions inside the BP_SharedFunctions blueprint library located in the Blueprints/Variables/ folder. Expand the “Spoil System” section to see the functions that are powering everything related to dates. You might also need to review and update the tap in points for onload and ontransfer in the process, these can be found inside the AC_Inventory component.
To make an item spoilable
Open the data table DT_Items, find your item and add two items to the ItemData, first one has a key onload with the value of spoil. This tells our system to apply the spoil system to it. Then add an Item Data key of spoil_time with a value being the number of seconds it should take to spoil this item. That is it, your item will now spoil.
To make another item spawn when a spoilable item spoils …
You guessed it, another item data key. Use the key spoil_item with the value equal to the ItemRowName of the item you want to give the player. In the demo world the golden goose egg expires and gives you a gold coin (currency) while when the raw and cooked meat spoil you get spoiled meat, which is the only way to obtain spoiled meat, it is also one of the required ingredients for the recipes to make poison.
To change the spoil speed multiplier …
This can be changed by adjusting the value of SpoilSpeedMultiplier on the AC_Inventory the spoiled item is being stored within.
Dyno I can’t find the freezer or rapid spoiler, where are they?
These are just copies of the storage container blueprint with an adjusted SpoilSpeedMultiplier on the AC_Inventory attached to the storage container.
To make the Freezer add a copy of the storage container blueprint to your world and adjust the value of SpoilSpeedMultiplier on the AC_Inventory component to 0.0001.
Drop another copy of the storage container in the world and set its SpoilSpeedMultiplier to 10, this is your Rapid Spoiler.
The default value for SpoilSpeedMultiplier is 1.0 and at 1.0 this will match the number of seconds you entered in the data table for spoil_time. A multiplier less than 1 like our freezer will slow down the rate of spoiling dramatically. A multiplier higher than 1 like our rapid spoiler will increase the speed.
Stopping the Spoiling of an item …
Currently there is no easy way to just stop or pause the spoiling of an item. This is functionality you will need to add if you really need it. A possible solution is removing the item data, but if you need to start spoiling the time again you may need to add additional code to handle reactivating it. As an alternative I recommend using a really ridiculously small SpoilSpeedMultiplier instead.
In our demo world a piece of raw meat expires after 2 minutes in our inventory, when it is in the freezer it will take over 13 days (real life time) to expire. This 13 days is with a value of 0.0001 for our SpoilSpeedMultiplier.
If you changed this value to 0.000001 that will push the spoil time to 1354 days (real life time). Let’s be reasonable here, if someone is still playing your game after that much real life time I think they will understand if a piece of meat eventually spoils from the stack!