Equipment System
UE5 Inventory and Item System Version: 3.0The included equipment system supports both modular and non-modular skeletal mesh pawns and equipment items can be both Static and Skeletal Meshes.
This equipment system will handle all the foundation needed to add equipment to your game, but it is your responsibility to code all the fun stuff related to your pawn, like animation montages and updating your animation blueprint when the stance changes. The equipment system will tell your character when it is time to do each of these (more on this later in the chapter).
Keep in mind there are limitations, and this is far from a full featured equipment system. The idea was to give you a solid jump off point for the most common use cases. If you are looking for something simple and easy to use, then this equipment system will be a good fit.
How it works …
Each equipped item then has its own equipment handler component and a visual component. The handler component is where all the magic happens and the logic within it only applies while it is equipped. This gives you the flexibility to come up with some really unique weapons and gear without creating a lot of bloat in your other blueprints.
The default equipment handler is for visual use only, but I have also provided a few additional equipment handlers to help you get started with adding functionality to your equipment. Included you will find a melee and range weapon handler (both semi-automatic and automatic) as well as some unique features like a trinket that makes your pawn smaller while equipped, and boots that add a little bang to your jump making you jump even higher. I have also included a handler which can be used when linking an equipment item skeletal mesh to your leader pose component.
There are a few other components involved in the process, but they are mostly used to manage the equipment. It may sound like a lot of moving parts, and it may take you some time to fully understand how everything works together, but I’ve done my best to keep each moving part as simple as possible. My advice is to take it slow, start off by setting up just one of your characters, and set up one equipment slot at a time on that character.
Setup Equipment System
Every game is different, and at the center of every game is your player’s character. You might have multiple unique characters or just one. Each might also have its own set of animations, skeletal sockets, and relative transforms. We needed to come up with a solution to handle supporting all of them. The best way I could come up with while still keeping it easy to use was by taking advantage of interfaced blueprint functions and events.
Each of your unique playable characters who will be using this equipment system will require integration of this equipment interface and the setup of its functions and events before equipment will appear on them.
These interfaced functions and events can be as simple or as complex as you need them to be but keep in mind the purpose of them is to provide the equipment system with the information it needs to know about your character. We also use them as a way for the equipment system to let your character know when certain events are handled (like when you equip, unequip, reload, and change stances).
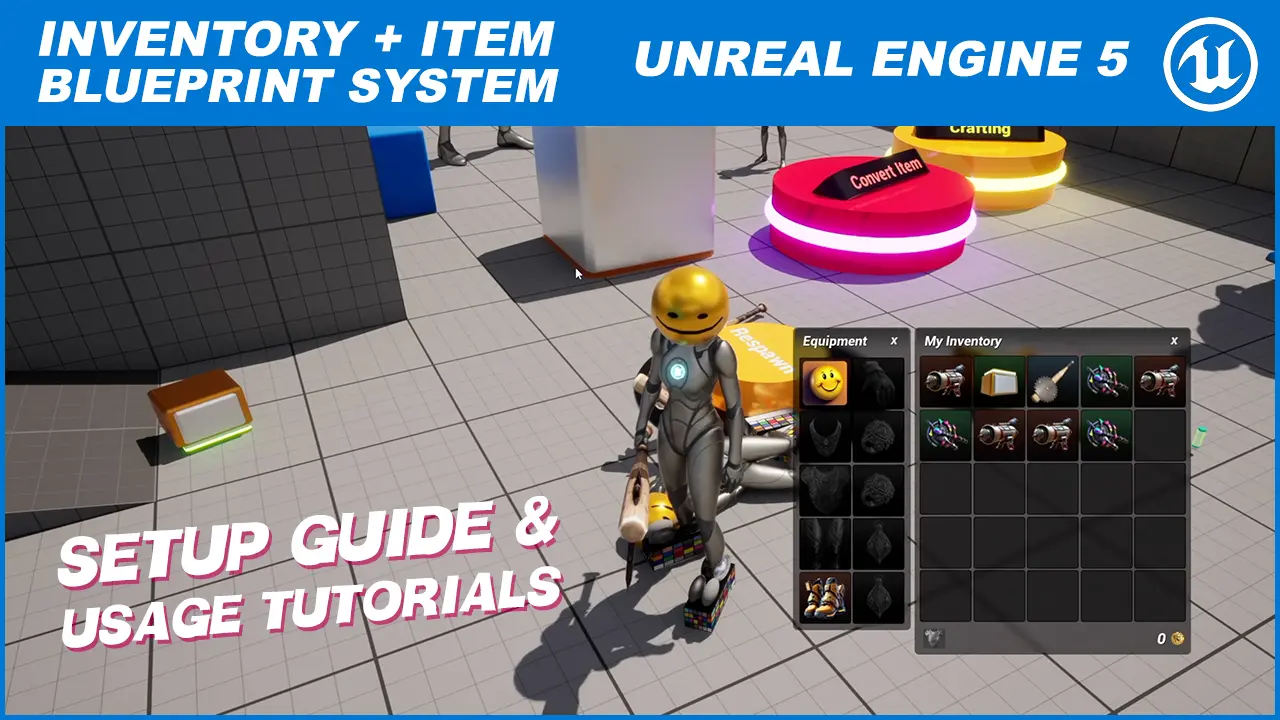
This "Setup Guide and Usage Tutorials" video will walk you through setting up your pawn for use with this equipment system, jump to minute 27 for the start of the equipment system guide.
Step 1 - Add the Blueprint Interface to your Pawn
- Open the Player Character blueprint
- Click Class Settings on the toolbar
- Click “Add” next to Implemented Interfaces on the Details panel.
- Search for and select BPI_Equipment. Do not select the BPI_EquipmentComponent, this is used by equipment handlers.
On the My Blueprint panel expand the Interfaces section. These are the functions and events added by the interface we just added.
The next part depends on the type of character pawn you are using.
Step 2 - Character Setup
Next we need to set up the events and functions that we implemented when we added our blueprint interface to our character pawn.
OnEquipmentEvent
This event is called whenever the equipment system has something important to tell the pawn. The following information is provided with this event:
The most common implementation of this event is to play a montage for (Equip, Unequip, Reload, Attack Primary, Attack Secondary) and save the value of ChangeEquipmentStance so the pawn’s AnimationBlueprint knows when our stance changes. Take a look at the ExampleCharacter in the blueprints folder for an example of how we are handling it in the demo world.
Keep in mind the point of this event is to handle just the things unique to the pawn. Anything unique to the equipment should stay inside of the equipment handler. For example we handle shooting projectiles for Dyno & Timmy’s Egg Launchers inside the Range Weapon Equipment Handler. We will go over equipment handlers later in this documentation. Remember, keep it simple!
GetEquipmentStance
Our next function is an easy one, this is how we tell whatever is asking what Equipment Stance currently set on our pawn. Plug in the variable you created for the OnEquipmentEvent for Stance Change events and select whatever your default stance for your pawn is.
Defining what stance to use is set inside of the equipment handlers but is calculated by the equipment system. Each time your equipment updates the system will count all the stance changers across your equipment. The one with the highest count (in most cases this is just the weapon), is the one that is chosen and is told to your pawn to use. While the backend for stance changing is handled for you, the value of this variable being set in your OnEquipmentEvent is where the stance system ends for this part of the system. You will have to work from this point to power your animation blueprints if you are changing your stance.
GetEquipmentMeshData
This is how we tell the equipment system how and where to either attach or replace equipment on our character’s skeletal mesh(es). I recommend the use of select nodes and collapsed graphs to keep this function simple and easy to work with. Take a look at the included ExampleCharacter in the Blueprints folder for an example setup.
When something is equipped the equipment system will call this function to ask the pawn where it should stick equipment for the EquipmentSlot. The pawn replies with the data the equipment system needs to properly attach or replace the equipment for the slot.
You do not need to provide a return value for everything. The return requirements for this function differ depending on the type of equip you are trying to perform.
Ask yourself, for this slot do you want to attach equipment to a socket on the character's current skeletal mesh, or do you want to replace the character skeletal mesh?
If you are using the default unreal mannequin you will be using the attachment method. Replacing the mesh is most common with modular characters where the character actually has multiple skeletal meshes for each major body part.
Take a look at the implementation inside the ExampleCharacter found in the Blueprints/ folder to see how I am using this in the Demo World.
Keep in mind, every time something is equipped the getEquipmentMeshData is called. If something is not positioning properly on your character when you equip it you can most likely solve the problem inside of this function.
GetEquipmentOverride (optional)
The last function can be found by expanding the Optional category in the interfaces panel. This optional function is used if you have a particular piece of equipment that needs a very slight nudge for the specific character but not for any other character. In our demo world we use this to shrink the size of just the BatAxe to 0.75 for just Quinn. If we wanted to adjust the transform of equipment for all characters we would do this inside the data table.
Step 3 - Setup Completed!
That is it, if you set everything up properly in these functions and events you should be able to equip equipment on your character now.
The best thing you can do while building out these functions is to keep it simple, start small, one equipment slot at a time. Also try to make use of editor tools like collapsed graphs and select nodes instead of making chains of if statements. The simpler you can make it, the easier it will be to understand when you come back to it a few months later to add some new equipment slots.
You can test this now if you already have some equipment created and ready but if you haven’t made any yet, keep reading as the next part of this chapter will go over the process of creating new equipment step by step. If you do test this right now and run into issues check the bottom of the Create Equipment chapter for the most common problems and things to check.
Create New Equipment
All pieces of equipment are considered items but not all items are considered equipment.
It is because of this simple fact that we don’t want to just stuff equipment specific data into our items data table, or vice versa. Instead we use two different data tables, one for the item information, and the other for equipment information.
So how do we associate the two with each other? We create the common link. The way I have handled that is by using and expecting the same row name in both data tables. It might be easier to show you, go ahead and open the DT_Items and the DT_Equipment data tables found in the Blueprints/Variables/DataTables folder. For every item in our DT_Equipment data table there is a matching row with the same exact row name in the DT_Items table. This is our common shared link.
The row in the DT_Items data table is how our equipment exists in our world when it is not being shown or used by our character. When you see it on the UI this is the item form of it. Such as when it is stored in our inventory or a storage container, or for sale on a vendor, loot in a chest, or the result of a crafting recipe.
When we attempt to equip or use our equipment is when the data from the DT_Equipment data table is used. Anything related to and including the mesh being used on our pawn when we equip something is found in this table.
For example you won’t find weapon names inside of the DT_Equipment because the weapon name does not matter when it is in the Equipment side of the system. Weapon name is something that is only visible when it is in the Item form, like when we hover over it in our inventory to see the item info tooltip. You will find EquipmentSlot in there, because every piece of equipment has an equipment slot, but not every item will have one, so our equipment data table is a more appropriate place for it.
Pop quiz Timmy! To add a new piece of equipment to our game, which data table do we need to use, DT_Items or DT_Equipment?
While the statement is true, that is not the correct answer. The answer is both! This is why we see the same row name in both data tables for “timmysegglauncher”. The one in DT_Items is used for our UI, and the one in DT_Equipment is for the mesh that appears on our character.
The correct answer was both. This is why we see the same row name in both data tables for “timmysegglauncher”. The one in DT_Items is used for our UI, and the one in DT_Equipment is for the mesh that appears on our character.
You nailed it! Good job, let's continue.
Ok, now I know you are just trying to mess with me! Let’s continue.
Adding Equipment - Item Data
Start off with DT_Items, add a new row for your equipment and fill out all the information. A breakdown of each row can be found on the Create Items chapter in this documentation. This section you are reading right now will highlight just the fields that you will want to make sure are set for equipment.
Make sure you set the RowName, and make sure you select “Equipment” for ItemType.
 Dyno - Hold up! I thought you just said all we needed was the shared row name?
You got me Timmy ... While it is all you need and equipment will work fine without setting this ItemType, this is how our UI side of things knows it is equipment without actually trying to get the equipment data first, which is a bit more efficient then querying our DT_Equipment data table with the getEquipment global function.
We can also use this for other things, like if we ever add some kind of auto-sorting to our inventory, this data is how we would drive it.
You will probably want to set the InventoryStackSize to 1, or else your equipment will stack.
You will need a Static Mesh version of your equipment. When it is dropped in the world this is the mesh that is shown. If all you have is a Skeletal Mesh you can generate a static mesh by opening the Skeletal Mesh and clicking the Make Static Mesh button on the toolbar.
Take note of the row name you set for your item, then head back to your viewport and drop a copy of BP_Interactable_Item from the Blueprints/Interactable/Items/ into the world and set the ItemRowName in the details panel to the row name we entered into the data table.
Press play and confirm that your item appears, and does not fall through the floor. If it falls through the floor it is a collision related issue. Open up the Static Mesh and verify the collision by clicking Show -> Simple Collision. If you don’t see a green wireframe, it doesn’t have one and you can add a simple collision with the Collision menu.
If your equipment still falls through the floor after setting the collision open it up again and navigate the details panel to Collision Complexity, make sure it is not set to use Complex as Simple. Any of the other options should work fine.
Pick up your item and confirm that everything looks good on the tooltip and icon in your inventory.
Adding Equipment - Equipment Data
Next let’s create the equipment side of things.
Open up the DT_Equipment data table and add a new row, make sure you set the row name to the same exact row name you set for the item version in the DT_Items data table.
Select which slot you want your equipment to assign to using the EquipSlot drop down. If you want to add more slots view the Equipment Slots section of this chapter. If you are adding something like a ring where you want to let the player have multiple rings just select the very first one and set up alternative equipment slots for the others, this is also explained in the equipment slots chapter.
Next is our mesh assignment, you actually have 3 options here, SkeletalMesh, StaticMesh or neither. If you select Skeletal Mesh do not provide the Static Mesh, and vice versa. Only fill out the one you want to use here.
If you do not provide either mesh your equipment will just not have a visual. It can still have stats and functionality. Take a look at the lucky charm trinket in the demo world, it has no visuals but when you equip it your character will shrink. It still works because the visual and the handler are separated in this system.
Next we have our BaseTransform, setting this transform adjusts the equipment transform for all characters. To adjust the transform for a specific slot on a specific character use the RelativeOffset variable in the GetEquipmentMeshData interfaced function we added to your pawn. To adjust the transform of a specific piece of gear on a specific character use the GetEquipmentOverride interface function also on your pawn.
EquipmentHandlerOverride is how we assign functionality to our equipment. You can leave this field blank if your equipment has no functionality. There is section in this chapter just on the equipment handlers so make sure you take a look at that when you are ready to create functionality for your equipment. For now you can leave it blank, which will use the default visual only handler.
The last field in our data table is the EquipmentMaterials. This is how we override the default materials on our mesh. Whenever you equip a piece of gear we first apply all the original materials to it, then we run through each of these assigned EquipmentMaterials and assign them. You might be wondering why it is a structure with 2 variables instead of just using a map, and that is because of multiplayer replication, you can’t replicate maps in multiplayer and using a structure is a simple work around. Because of this it is possible to assign multiple materials to the same slot, and if you do this by accident the one last in the list will be the one that appears on the mesh.
After adding your item, press play and give it a try. You should be able to equip your item to the proper slot, and when you do you should see it on your character.
Dyno! It doesn’t work!
Here are the most common reasons why it would not work:
- If you can’t equip your item (does not show in the equipment ui or hotbar)… open both the items data table and the equipment data table and make sure your equipment and item both have the same exact row name. Then verify that your EquipSlot in your equipment data table is valid, and that your ItemType in the item data table for the equipment item is set to Equipment.
- If you see your equipment but it is in the wrong slot …First check the EquipSlot in the DT_Equipment datatable to make sure it is valid. If it is then head back into the getEquipmentMeshData and make sure you assigned the right socket if it is an attachment type, or that you provided the right mesh to use if it is a modular type.
- If you don’t see your equipment at all … First check if it is rendering under the ground by jumping. If you see it then you have a wrong location issue (see above). If you still don’t see it, double check the DT_Equipments table and make sure you assigned a skeletal or static mesh and that the BaseTransform scale is not set to 0x0x0. You can also check the 2 other transform points located in (getEquipmentMeshData and getEquipmentOverride).
- If you see your equipment, and it appears to be in the right socket, but the offset or rotation of it is not right … First check your socket on your skeleton. Open up the skeleton and attach your mesh to the socket manually, and maybe try a few other meshes. If all the meshes are wrong then adjust the socket. If it is just the one particular mesh you will need to either adjust the pivot point for it using modeler mode, or adjust the BaseTransform in the equipment data table, or your AttachRelativeOffset in the getEquipmentMeshData, or the getEquipmentOverride if you have one set up for this equipment item.
- If you still do not see your equipment check your output log to see if you get any warnings or errors. If you do, examine the linked nodes. You may be able to figure out what you are missing by seeing what is happening at that specific location. Also make sure you are using the right pawn blueprint.
- For modular equipment, if you see your equipment when you equip it, but when you unequip your mesh vanishes then you are not providing a valid ModularDefaultSkeletalMesh through the getEquipmentMeshData for the requested slot.
- If your equipment is visible and it should follow the leader pose for your animation but isn’t … First make sure you are using a valid skeletal mesh, and that it has the same skeleton as the one you are trying to match the pose of. If it doesn’t then this will not work. I’m not sure of a solution that can be done on the fly (if you know one please let me know). If your skeletal mesh is valid, make sure the proper leader mesh is connected to the AttachLeaderPoseComponent on the return of your getEquipmentMeshData function. You also will need to set the EquipmentHandler to AC_Equipment_SimpleLeaderPose inside the equipment data table, or if you are using a custom made EquipmentHandler you should set the ShouldPose? Boolean to true inside of the EquipmentHandler (enable “Show Inherited Variables” using the gear icon on the MyBlueprint tab to show the variable in the variable list).
Equipment Handlers
Equipment Handlers is how we add functionality to our equipment, like when we swing the Bat Axe, or shoot and reload Timmy’s Egg Launcher. We also use them to create the shrink effect when you equip the Lucky Charm, and the extra high jump that occurs when we jump while wearing the rocket boots.
We set our Equipment Handler for each item using the EquipmentHandlerOverride field of our DT_Equipment data table. This field is of type AC_EquipmentHandler, which is the base equipment handler blueprint. You can find all the included equipment handlers in the Blueprints/Components/EquipmentHandlers folder. At the top of this folder is the parent (base) blueprint AC_EquipmentHandler, and in each sub-folder you will find related child blueprints.
If you are not familiar with parent to child inheritance it is how we can put shared logic in multiple blueprints without having to create multiple copies of the same logic for each individual one. Everything from the parent is available in the child.
Our AC_EquipmentHandler is the parent for all equipment handlers, it includes all the basic logic required to render your equipment item, attaching it to your pawn, relaying data to your pawn and capturing inputs. These functionalities are something you would expect with every piece of equipment, and this is why we use the parent to child inheritance.
You should take extra caution when working inside of a parent blueprint like AC_EquipmentHandler. Always keep in mind what you do inside should be related to all possible child blueprints. If what you are adding only applies to some of the child blueprints then you need to create another child blueprint that is between the main parent blueprint and your current child blueprints, then re-parent your current child to the new middle-child. It may sound a little crazy at first but it is a great practice and one all developers should take advantage of.
Base Handler
If you do not specify an EquipmentHandlerOverride the base AC_EquipmentHandler is used. This equipment handler is visual only, meaning there is no added functionality. This base handler is also used to handle the equipping and relaying information to and from the pawn.
The following variables are available in the base handler, and all child blueprints:
ChangeStanceTo (default: null) if this equipment should influence the stance of the character set the stance here. This value is used when the AC_Equipment_PlayerPawn refreshes our stance. This is done through a count of each of these variables currently equipped to your pawn. The stance with the highest count is the one the system tells the pawn to set with the EquipmentEvent Stance Change. If it is set to null (default) it will not be counted in this tally.
DelayShowMesh (default: 0.25) this is how long you would like the equipment handler to wait before actually showing the mesh, you could use this to time showing the mesh with an animation. This is purely visual, to also delay using the equipment set the value of DelayAttackOnEquip.
DelayAttackOnEquip (default: 0.25) this is how long you would like the player to wait after equipping an item before they can attack with it. Counting starts at about the same time as the DelayShowMesh, they do not have any influence over each other. This delay can also be used to help mitigate weapon swap based animation canceling.
ManualUnequip? (default: false) under some circumstances you may need to delay the actual destruction of equipment to make sure something else is handled first. An example of this is our lucky charm trinket. In multiplayer we have to give the code a chance to replicate the re-setting of the scale or else our character will not appear right to other clients. Setting this variable to true will require you to call the ManualUnequip when ready. There is also an event you can override called OnUnequip if you need a point to start your unequip logic in your child blueprint. Take a look at the lucky charm example trinket if you need help using this.
ShouldPose? (default: false) this only works if you are attaching and your equipment is using a Skeletal Mesh with a skeleton that is compatible with your pawn’s skeletal mesh. For modular equipment this is ignored as you should already have your skeletal meshes configured to your leader pose outside of the equipment system. Using this variable also requires you to provide a valid AttachLeaderPoseComponent through the getEquipmentMeshData function on your pawn (the value should be the leader mesh component to follow from your pawn). Setting ShouldPose? to true with all the requirements as valid will make the skeletal mesh of your equipment follow the leader mesh’s animations. If your equipment is non-functional but needs to pose you can use the AC_Equipment_SimpleLeaderPose equipment handler. The only thing this handler is doing is setting this ShouldPose? Variable to true.
Melee Weapon
AC_Equipment_MeleeWeapon is a child of our AC_EquipmentHandler, and adds the functionality of 2 different weapon swing equipment events (MeleeAttackPrimary & MeleeAttackSecondary) that are sent to the pawn on each swing. Each also has a throttle to delay time between swings. The melee weapon handler exposes the following variables to all it’s children in addition to those of its parent:
PrimaryAttackThrottle (default: 0.45) the throttle for how fast the player can re-swing the primary attack. By default it is lower than our secondary as it is intended to be a fast swing.
SecondaryAttackThrottle (default: 1.0) the throttle for how fast the player can re-swing the secondary attack. By default it is higher than our primary as it is intended for a heavy swing.
It is possible to “animation cancel” with this default setup. If you would like to avoid this you need to add another boolean check to see if an attack is already in progress, then set and unset this variable at the appropriate times. I made a note of this inside of the blueprint to remind you.
Range Weapons
AC_Equipment_RangeWeapon is also a child of our AC_EquipmentHandler. This handler adds the shooting of projectiles and reloading functionality and equipment events (Shoot & Reload) to our base class and exposes to us the following variables:
ClipSize (default: 12) how many rounds of ammo can be shot between reloads this range weapon has.
isAutomatic? (default: false) can the player hold the button down to automatically fire this weapon?
AutomaticFireRate (default: 0.25) the time between shots with an automatic weapon.
ReloadDelay (default: 1.0) the amount of time to stop accepting attack input while the equipment is being reloaded.
ProjectileClass (default: BP_EggProjectile) the class of the projectile to use. Make sure the blueprint you select has a projectile movement component or the projectile will not move.
ProjectileScale (default: 1x1x1) Override the default scale of the ProjectileClass with this scale.
Projectile Troubleshooting
Dyno! The projectile is going the wrong way and sometimes explodes right when I shoot!
Both of these issues can be explained by the socket. By default projectiles will spawn at the socket called 'projectile' on the skeletal mesh of your weapon. If you do not have this socket (or are not using a skeletal mesh) it will spawn at the pivot point for the mesh. Either add and position this socket right in front of the muzzle, or update the spawning code found inside the range weapon handler to better account for this in your game. You might also be able to tweak the collisions to have it ignore your mesh.
Keep in mind while this projectile does report what it hits most games handle the actual projectile hit process with a line trace instead, and if a projectile is shown it is used purely as visual. The included examples are just lobbing a projectile out of the front of the weapon. If your animations or stance are not perfect this will cause the muzzle of your weapon not to point in the right direction, which will cause the projectile to go in an odd direction. One thing that might help you is using an aim offset.
Another issue might be the orientation and velocity direction of your projectile, this is something you would solve inside your projectile blueprint. Take a look at the included examples and their settings. The projectiles can be found in the Demo/Projectiles/ folder.
Range Weapon - Timmy’s Egg Launcher example
AC_Equipment_TimmysEggLauncher is a child of AC_Equipment_RangeWeapon and does not add any functionality, the only thing it does is change some of the variables provided to it from the AC_Equipment_RangeWeapon. The variables that are changed are: ReloadDelay (from 1 to 2), ProjectileClass (from BP_EggProjectile to BP_TimmysEggProjectile), and ProjectileScale (from 1 to 0.1).

Range Weapon - Dyno’s Egg Launcher example
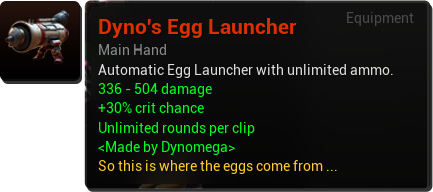
AC_Equipment_DynosEggLauncher is a child of AC_Equipment_RangeWeapon and like Timmy’s Egg Launcher does not add any functionality and only changes a few of the variables provided to it from the AC_Equipment_RangeWeapon class.The variables we change are ClipSize (setting it to 0 makes it an unlimited size clip). We also set isAutomatic? to true from false and we have a slightly faster than default AutomaticFireRate (from 0.25 to 0.15). We also adjust our ProjectileScale (from 1 to 0.5).
Cool right? Just changing variables to make completely unique weapons. It is still possible but it is a lot harder to break things when all we are doing is changing variables, this is the true power of inheritance.
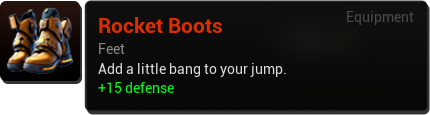
Rocket Boots Example
The rocket boots example is a child of the base handler, and can be found in the Armor/ sub folder. The added functionality here is we launch the player shortly after they jump, causing them to jump even higher.
Lucky Charm Trinket
The lucky charm trinket is the one that makes us shrink. You can find this one in the Trinkets/ subfolder. This one is also just a child of the base handler.
Simple Leader Pose
This equipment handler component is used if you have a skeletal mesh you want to match the animations of another mesh. Such as a jacket. This handler is just setting the ShouldPose? Boolean to true from the base handler. You can find this one in the Armor/ subfolder. For this to work your skeletal mesh must have a skeleton matching the one it is using as the leader. The leader mesh you define inside the getEquipmentMeshData function on your pawn.
Clip Size Override
I have also included the clip_size item data override, which is something you can use to change the size of the clip via th DT_Items. Before you use it I recommend reading the chapter on Item Data.
To use this override add a new ItemData to your item in the data table and set the key of your item data element to clip_size and the value is the count the clip size should be. You can follow the logic this uses if you want to set up item data overriders for the other variables.
Hotbar Ammo Tracker
The hotbar ammo tracker is how we track the current clip count of our ammo for each weapon equipped on our hotbar using the AC_Equipment_RangeWeapon equipment handler. By default the clip is empty, which will require the equipment to be reloaded on or before the first shot.
If we were to load our gun, shoot a few rounds, and switch to another weapon, when we switch back we would expect our weapon to still have the clip size it had when we switched away from it right? This is exactly what the Hotbar Ammo Tracker solves for us, and it does this without manipulating item data to keep track of the current clip count. Without it we would have to reload every time we switched back, which is going to probably upset your player.
There are some limitations to this, for once and most importantly it only works if you are equipping items to the hotbar. If you are using the equipment weapon to equip items then you really don’t need this type of functionality. Going this route will also require you to make modifications to the AC_Equipment_RangeHandler as the way the it handles the clip count is through the HotbarAmmoTracker.
Another limitation to this is when we change pawns and levels the current clip will be reset and will need to be reloaded before next use. Also if we remove equipment from the hotbar and put it back it will also be reset and require reloading.
If you want this to persist through this then you will need to make more adjustments and use the item data system to store and retrieve the clip data instead. The problem with this is every time you update the data it is going to fire off a save. Which is a lot of saving if you are using an automatic weapon.
Create Your Own Equipment Handlers
To create your own handler make a child of the AC_EquipmentHandler blueprint by right clicking and selecting “Create Child Blueprint Class”. Open up the blueprint then override the following events to build out your functionality:
onEquip this is called at the very end of the equip process, right before the EquipmentEvent for equip is sent to the pawn.
onUnequip this is called when the equipment handler component is about to be destroyed. To use this you will also want to set the value of “ManualUnequip?” to true, and then call ManualUnequip when it is ok to continue with the process. Take a look at the Lucky Charm trinket example to see this process in action.
onPrimaryAttack is called when the equipment primary attack input action is pressed down.
onPrimaryAttackStop is called when the primary attack input action is released. This can be used as the stopper when you want the user to hold the button to attack (automatic weapon, flame thrower etc).
onSecondaryAttack is called when the equipment secondary attack input action is pressed down.
onSecondaryAttackStop is called when the equipment secondary attack input action is released. Works just like the primary variant but is tied to another input. Maybe you will want to use this to control when your character is looking through a scope of a rifle?
onDoJump is called when the equipment jump input action is pressed. We use this with our rocket boots.
onDoJumpStop is called when the equipment jump input action is released. This is not currently used in the demo, but this could come in handy if you were to make a jetpack that works while the jump button is held down, and stops when it is released.
Equipment Input
The input actions are how we catch the attacks that need to be processed by our EquipmentHandlers. I have included 3 inputs, a primary attack, a secondary attack, and a jump detector. You can tap into these in your equipment handler by overriding the appropriate event (see the list of override events in the previous Create Your Own Handler section).
How to add more input actions …
Create your new input action. Add it to the IMC_InventoryItemSystem and set your key binding.
Capture the input action like we are doing in the AC_InventoryItemSystem key bindings event graph.
From here relay this information to events you create on the AC_Equipment_PlayerPawn component. You should see ones for attack and jump already in this location.
From this PlayerPawn component we set up and call event dispatchers when these events detect anything from our input.
We bind into these event dispatchers through AC_EquipmentHandler.
From here we call the appropriate event that we want to override in our equipment handler child.
If you are adding more attacks you can skip steps 3, 4 & 5 by using the logic I have already added, which passes an attack index (0 is primary, 1 is secondary). To use this you will just need to create and set up the new input actions to use my attack handlers like I am doing in the AC_InventoryItemSystem key bindings graph. Then just adjust the tryStartAttack and tryStopAttack functions found inside the base AC_EquipmentHandler to call a new event that you create that you can override in your child blueprint.
Equipment Slots
Equipment slots are how we define where equipment goes when equipped on our character.
Create New Equipment Slot
Open E_EquipmentSlots and add an enumerator. Each enumeration is a possible equipment slot. Give it a display name. This text is shown in two locations, on the tooltip (if ItemType is set to equipment), and when you hover over an empty slot in the equipment window. One thing you want to be careful with is changing the order of these enumerations. There is no need to change this order, and doing so will cause things to get shifted around inside of your equipment data table for each equipment item. This order also does not influence the order shown inside the UI equipment window.
Next we need to add our equipment slot to the UI_Equipment_Tab found in the UIs/Equipment folder. Open this widget blueprint up and from the designer tab duplicate the last UI_EquipmentSlot in the EquipmentItems grid. Set the row and column to the next valid grid location by selecting the UI_EquipmentSlot you duplicated and updating the row and column data. It is very important that your UI_EquipmentSlot widgets in the EquipmentItems grid on the hierarchy panel are ordered to flow with your equipment window grid. The top to bottom should match the flow of your widgets from left to right. Neglecting this can cause jumping around issues when navigating the equipment window with a gamepad. The diagram below should help illustrate the flow:

The last part is configuring our character pawn to show equipment put in this slot, but this is only needed if your slot actually has visuals for items going in this slot. Things like trinkets and rings may not (more games should!). If items in this equipment slot will have a visual head back into your getEquipmentMeshData function on each of your pawns and add all the references needed for your new slot. If you haven’t set up your pawn yet you probably have no idea what I am talking about here and in that case you can ignore this step, it is something you can handle when you set up your pawn.
Alternative Equipment Slots
Alternative slots give your players the ability to equip multiples of the same equipment type, a good example of this in games is Rings and trinkets. In most games that have them you will probably have 2 slots for each.
The included alternative slots system makes this process a lot easier on you. When you add equipment you only need to select one of the slots (usually the first).
If something is detected in that slot it will check to see if any alternative slots have room for it. If there is room it will assign it to the alternative slot instead. The process happens automatically for you all you need to do is create the links between the slots.
To create a link between slots …
Do this using the variable found in the details panel of the AC_InventoryItemSystem you attached to your player controller. Navigate to the EquipmentSystem section and expand EquipmentSlotAlternatives.
Each Key is the slot we are looking to find an alternative slot for. The value for each is an array of other possible alternative slots. You need to set up a new link for each possible slot.
For example if you have 2 ring slots, you will have 2 entries in EquipmentSlotAlternatives for rings, where each one has only one EquipmentSlots item in its array that is pointing to one other slot.
If you had 3 ring slots you would have 3 entries in EquipmentSlotAlternatives for rings, then the value for each would have 2 items in the EquipmentSlots array. One for each of the other 2 slots.
You can have as many as you need, the system will iterate from top to bottom through the EquipmentSlots for each alternative until it finds an empty one.
Now when you add equipment, all you need to do is assign it to the first slot, and it will still work with all the alternative slots while at the same time still giving you the flexibility to independently control the meshes for each slot on your pawn.
Equipment Mirroring
Equipment mirroring is how we show boots on both feet, or gloves on both hands while using our equipment attachment method.
How to Mirror Equipment
Head on over to the getEquipmentMeshData function on your pawn. The AttachMirrorSocketName is what you need to provide for your mirror to slot. So if you are mirroring a boot from one foot to the other and your socket for the right foot is foot_rSocket, the AttachMirrorSocketName will probably be foot_lSocket.
You can also use AttachMirrorScale to change the scale for just the mirror. This is useful if you want to flip your boot on the symmetry line. You know how your right shoe has a slight curve inward? You would expect the one on your left foot to also curve inward too right? If we just mirrored it from the right foot it would curve outward. By setting one of our axis in this AttachMirrorScale vector to -1 it will flip it so it curves inward.
From my tests this flip effect seems to require Two Sided to be set to true inside of the material for mirroring in multiplayer replication. I really have no idea why, I am not a material expert, all I know is with two sided disabled it does not seem to work right in multiplayer. If you happen to know or can figure out why please let me know!
But Dyno, my boots have both feet already on them, how do I use them?
In this scenario the leader pose approach will probably work best instead of mirroring. Keep in mind though that you can only use this with skeletal meshes that have a skeleton layout matching your leader skeletal mesh’s skeleton. If this is not the case then your best bet is to try and break the mesh apart so you have just the one boot, then use the mirroring method.
A note about mirroring modular skeletal meshes …
This feature was designed to work only with the attachment equipment method. I don’t think you will ever need this for modular pawns. From what I saw in the marketplace the hands and feet are always on the same skeletal mesh, which we are already replacing through the modular equip method. If for some reason you do end up needing this support for a modular setup please share your use case with me and I will consider adding it if enough people need it.
Equipment Stances
It is common in games to see a player’s stance adjust based on the weapon they are wielding. For example you wouldn’t hold a pistol the same way you hold a rifle, or an axe. If you need this type of functionality I’ve included a simple operation that will help you get started by calculating and telling your pawn what stance to use based on what you have equipped.
Stance Determination Calculation
Inside each AC_EquipmentHandler component is a variable called ChangeStanceTo. The value of this variable is how that piece of equipment influences the stance the equipment system tells your pawn to use. Here is how it works …
Whenever your equipment changes the equipment system will scan all your currently equipped gear and make a tally of each ChangeStanceTo you have set. The stance with the highest count is the one the equipment system tells your pawn to use.
In most games this will just be the weapon, but this type of system can be leveraged to have a pawn with a dynamic stance that adjusts based on the scoring of their overall gear. For example if your character has mostly gear on that lets them Sneak you could update their stance to reflect that using this type of system.
After calculating the winning equipment stance the equipment system will tell the pawn what stance to use using the OnEquipmentEvent event from the equipment interface we created on your pawn when setting it up for the equipment system. The EventType will be “Stance Change”, and the value of EquipmentChangeStance will be set.
Please keep in mind this value for EquipmentChangeStance is only set when a “Stance Change” event is dispatched, every other event it will return as null. You do not want to update your end every event that your pawn receives. Instead check to make sure the event type is set to “Stance Change” before you update it. The included ExampleCharacter handles it this way.
The system will also only send this stance change event if the stance it calculates is not equal to the stance currently set on your pawn. It gets the current stance from your pawn using the getEquipmentStance interface function we added to your pawn.
Adding a new Stance
To add a new stance all you need to do is edit the E_EquipmentStances enumeration found in the Blueprints/Variables/Enums folder. You should avoid re-arranging the stances in this enum, it could cause the ChangeStanceTo variables in the EquipmentHandlers to break, which will leave you wondering why your stance is not changing!
Changing Animation Stance
So how exactly do we use this to change our character’s “visual” stance? That is where your animation blueprint and/or blend spaces come into play, and this is something you will need the animations for as you will not find any sort of stance/movement animations in this asset outside of the ones provided with the unreal mannequin. I am not an animator, know your limits!
What I’ve provided is simply the logic driver behind what stance you should use. This is the value of our EquipmentStance variable we are setting when the EquipmentEvent “Stance Change” is sent is what you will want to use to drive your logic.
To help you down the path, the most common approaches I see for this is either swapping the animation blueprint to another one when the stance changes, or by accessing this EquipmentStance variable from within your animation blueprint to power a blend space. You do have to expose the blend space pin before you can attach a select node up to it. We then use our enum as the index for the select node and then we will have the option to provide a different blend space for each of our stances.
I do have plans to make a video tutorial to go over this topic using the blend space approach, and when I do I will post it on my youtube channel and add it to this section.
Equipment Stats
What about the most important part about our equipment, the stats?
I am recommending people to try the new Item Data System for handling stats for these reasons:
You can take advantage of easily showing the stats you want to show on the item tooltips using the public data formatters. You can also have stats that are completely hidden to the player.
You can use the getEquippedStats function found on the AC_InventoryItemSystem component when you need to know the total stats (like when dealing damage). This little helper function will calculate the sum of all our numeric values found in the ItemData for each unique key of all currently equipped items and then returns us a map containing the key and the total. This function is also easily accessible to you from within the equipment handlers using this get reference chain: Get EquipmentPawnComponent -> AC_EquipmentSystem -> AC_InventoryItemSystem -> GetEquippedStats().